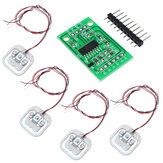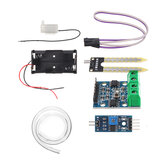
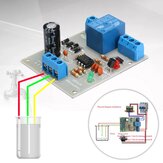
Automatic Irrigation Module DIY Set for Soil Moisture Detection and Automatic Water Pumping
US$5.66
A part of the review has been auto-translated.
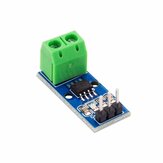
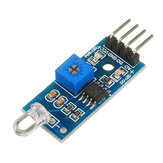
Nice and simple. Working as described. Here is the connection information if you need it. =>Automatic Irrigation Pump<= Connect + (sensor board) to soil probe. Connect - (sensor board) to soil probe. Connect VCC (sensor board) to battery positive. Connect GND (sensor board) to battery negative. Connect D0 (sensor board) to B-1A (motor controller board). Connect VCC (motor controller board) to battery positive. Connect GND (motor controller board) to battery negative. Connect B-2A (motor controller board) to battery negative. Connect pump - (motor controller board) to Motor B terminal #1 (board with screw on terminals on the right side). Connect pump + (motor controller board) to Motor B terminal #2 (board with screw on terminals on the right side). =>Testing<= 1. Place pump in water (pump cannot run dry). Connect the red wire of the pump to battery positive Connect the black wire of the pump to battery negative 2. Test the motor controller board: Connect VCC (motor controller board) to battery positive. Connect GND (motor controller board) to battery negative. Connect B-2A (motor controller board) to battery negative. Place pump in water (pump cannot run dry). Connect pump - (motor controller board) to Motor B terminal #1 (board with screw on terminals on the right side). Connect pump + (motor controller board) to Motor B terminal #2 (board with screw on terminals on the right side). B-1A on motor controller board activates pump when connected to battery negative. 3. Test the soil moisture sensor module: Connect + (sensor board) to soil probe. Connect - (sensor board) to soil probe. Connect VCC (sensor board) to battery positive. Connect GND (sensor board) to battery negative. The red power lamp is always on. The green/blue led will blink once. Dip the probe directly into water (covering only the probe metal tip) the green/blue light will on.

good deal


Took a while to work out the wiring as no wiring diagram is supplied and the photographs on the product information are for a different unit. Once I managed to work out the wiring requirements it worked well. Basically three wires are needed to the sensor board : VCC - GND and sensor output from pin B-1A, Control board needs: B-2A linking to GND, input from sensor board to B-1A and the power supply permanently wired to the back of the VCC and GND terminals.
do not buy it. pump and sensor work for just 4 days
the connection was a little difficult, had to be added with a couple of cables and connectors, but it works
PRODUTO INTERESSANTE .

fast delivery, nice quality. need to start my project with these devices soon
Perfect shipment THX
The kids will love it.
foctionne bien, mais pas avec 2 piles AA, la tension est trop faible pour la pompe. j’ai testé avec un accu LiIon 4,2 V type 18650, c’est ok.

3pcs Capacitive Soil Moisture Sensor Switch Not Easy To Corrode Wide Voltage Module


Laser Receiver Module Non-modulator Tube Laser Sensor Module
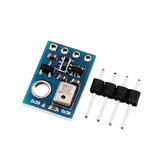
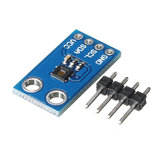
GY-BMP280-3.3 High Precision Atmospheric Pressure Sensor Module

8ch 4-20MA/0-10V Current Voltage ADC Collector Read Capture Module RS485 MODBUS RTU PLC Board
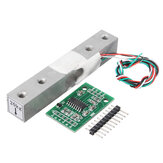
HX711 24bit AD Module + 1kg Aluminum Alloy Scale Weighing Sensor Switch Load Cell Kit
FSR402 Force Sensitive Resistor 0.5 Inch FSR Pressure Sensor Module DIY KIT

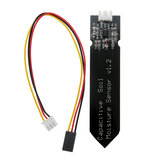
Capacitive Soil Moisture Sensor Not Easy To Corrode Wide Voltage Monitor Module
CJMCU-1080 HDC1080 High Precision Temperature And Humidity Sensor Module

AHT10 High Precision Digital Temperature and Humidity Sensor Measurement Module I2C Communication
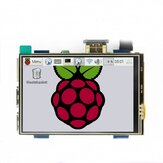
MPI3508 3.5 inch USB Touch Screen Real HD 1920x1080 LCD Display For Raspberry Pi 3/2/B+/B/A+
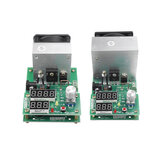
Original ZHIYU® 60W / 110W 9.99A 30V Constant Current Electronic Load Aging Battery Capacity Tester
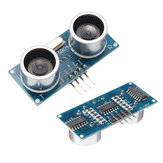
Geekcreit® Ultrasonic Module HC-SR04 Distance Measuring Ranging Transducers Sensor DC 5V 2-450cm
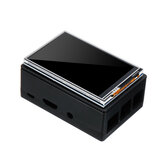
3.5 Inch 320x480 TFT Touch Screen LCD Display Monitor + Case For Raspberry Pi
10pcs PAM8403 2 Channel USB Power Audio Amplifier Module Board 3Wx2 Volume Control

AD8232 Measurement Pulse Heart Monitoring Heartbeat Sensor Module Monitor Devices

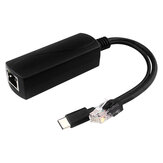
100Mbps/1000Mbps 5V 3A Type-C Power Over Ethernet Active POE Splitter for Raspberry Pi 4B
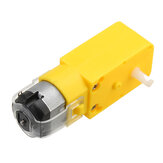
10Pcs DC 3V-6V Single Axis Gear Reducer Motor For DIY Smart Car Robot
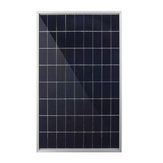
10W 12V Portable Solar Panel WIth Battery Clip + 40A Solar Controller Kit for Camping Traveling

Ultrasonic Module HC-SR04 Distance Measuring Ranging Transducers Sensor DC 5V 2-450cm