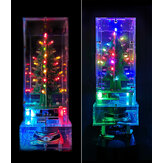
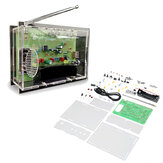
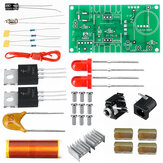
DIY Christmas Tree LED Flashing Light Kit Circuit Board Mould Green Xmas
Customer Reviews
- All Reviews (41)
- Image (3)
- Video (0)
A part of the review has been auto-translated.
-
26/11/2023
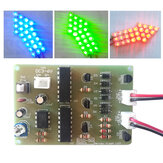
Easy to solder amd build LED Christmas tree As we are used to from such deliveries from China, the components are squeezed together in a far too small plastic bag. Fortunately, there are no fragile parts inside! No manual is included, but several building descriptions can be found on the internet. There is nothing to criticise about the quality of the components supplied, which is good. However, in some kits, all the LEDs supplied are transparent and then you cannot see what colour they emit. The Christmas tree consists of two identical circuits, built on two almost identical PCB. Once these PCBs are fully soldered, you need to slide them together and mount them on the lower PCB. Even such a cheap kit comes with double-sided, metallised PCBs. The standard schematic of an astable multivibrator with two transistors has been extended with an extra stage. Basically, three RC networks C1/R3, C2/R5 and C3/R1 control the base of the transistors. Such a capacitor puts a negative voltage on the base at some point in the cycle. That negative voltage flows through the resistor to the positive power supply. The moment the voltage at the base rises to about +0.65 V, the relevant transistor starts to conduct. The collector voltage goes to zero, the LEDs in the collector light up. The negative voltage jump on the collector creates the negative voltage on the base of the next transistor. In this way, the system maintains itself and the three transistors Q1, Q2 and Q3 take turns to conduct.
CommentsShow Original -
 hazzemanVIP3SE28/06/2023
This is an good start project to begin with. A bit sorry that it wasn't any instruction with the kit. But a bit of searching, and that was also solved. Found a good instruction here: https://www.sarcnet.org/files/CTR-30.pdf
CommentsShow Original -
21/04/2023
another two to build some day
CommentsShow Original -
13/01/2023
WHERE IS THE INSTRUCTIONSjQuery111308408430995924251_1673656185799?? SEND THAM PLEASE!
CommentsShow Original -
12/12/2022
It's a very good Christmas product, easy to put together, excellent exercise for beginners.
CommentsShow Original -
03/03/2024
Excellent item
CommentsShow Original -
 cqspeterHU31/01/2024
fast delivery, thank you
CommentsShow Original -
22/01/2024
The product is satisfactory. The packaging could have been a bit more sturdy. The delivery time was fabulous.
CommentsShow Original -
18/01/2024
I'm not building now.
CommentsShow Original -
 thollVIP5US26/12/2023
Nice item.
CommentsShow Original


